Bake Easy Mini Pumpkin Pies in a Muffin Pan: Your Stress-Free Thanksgiving Dessert Solution
Thanksgiving dinner is a feast for the senses, but often, the sheer effort involved can feel overwhelming. Among the many dishes vying for attention, the classic pumpkin pie often stands as a formidable challenge for even seasoned bakers. Between crafting the perfect crust, achieving that ideal custard consistency, and presenting a picture-perfect slice, it's easy to feel intimidated. But what if we told you there's a charming, utterly delicious, and incredibly simple alternative that will not only impress your guests but also free up your precious holiday time?
Enter the world of
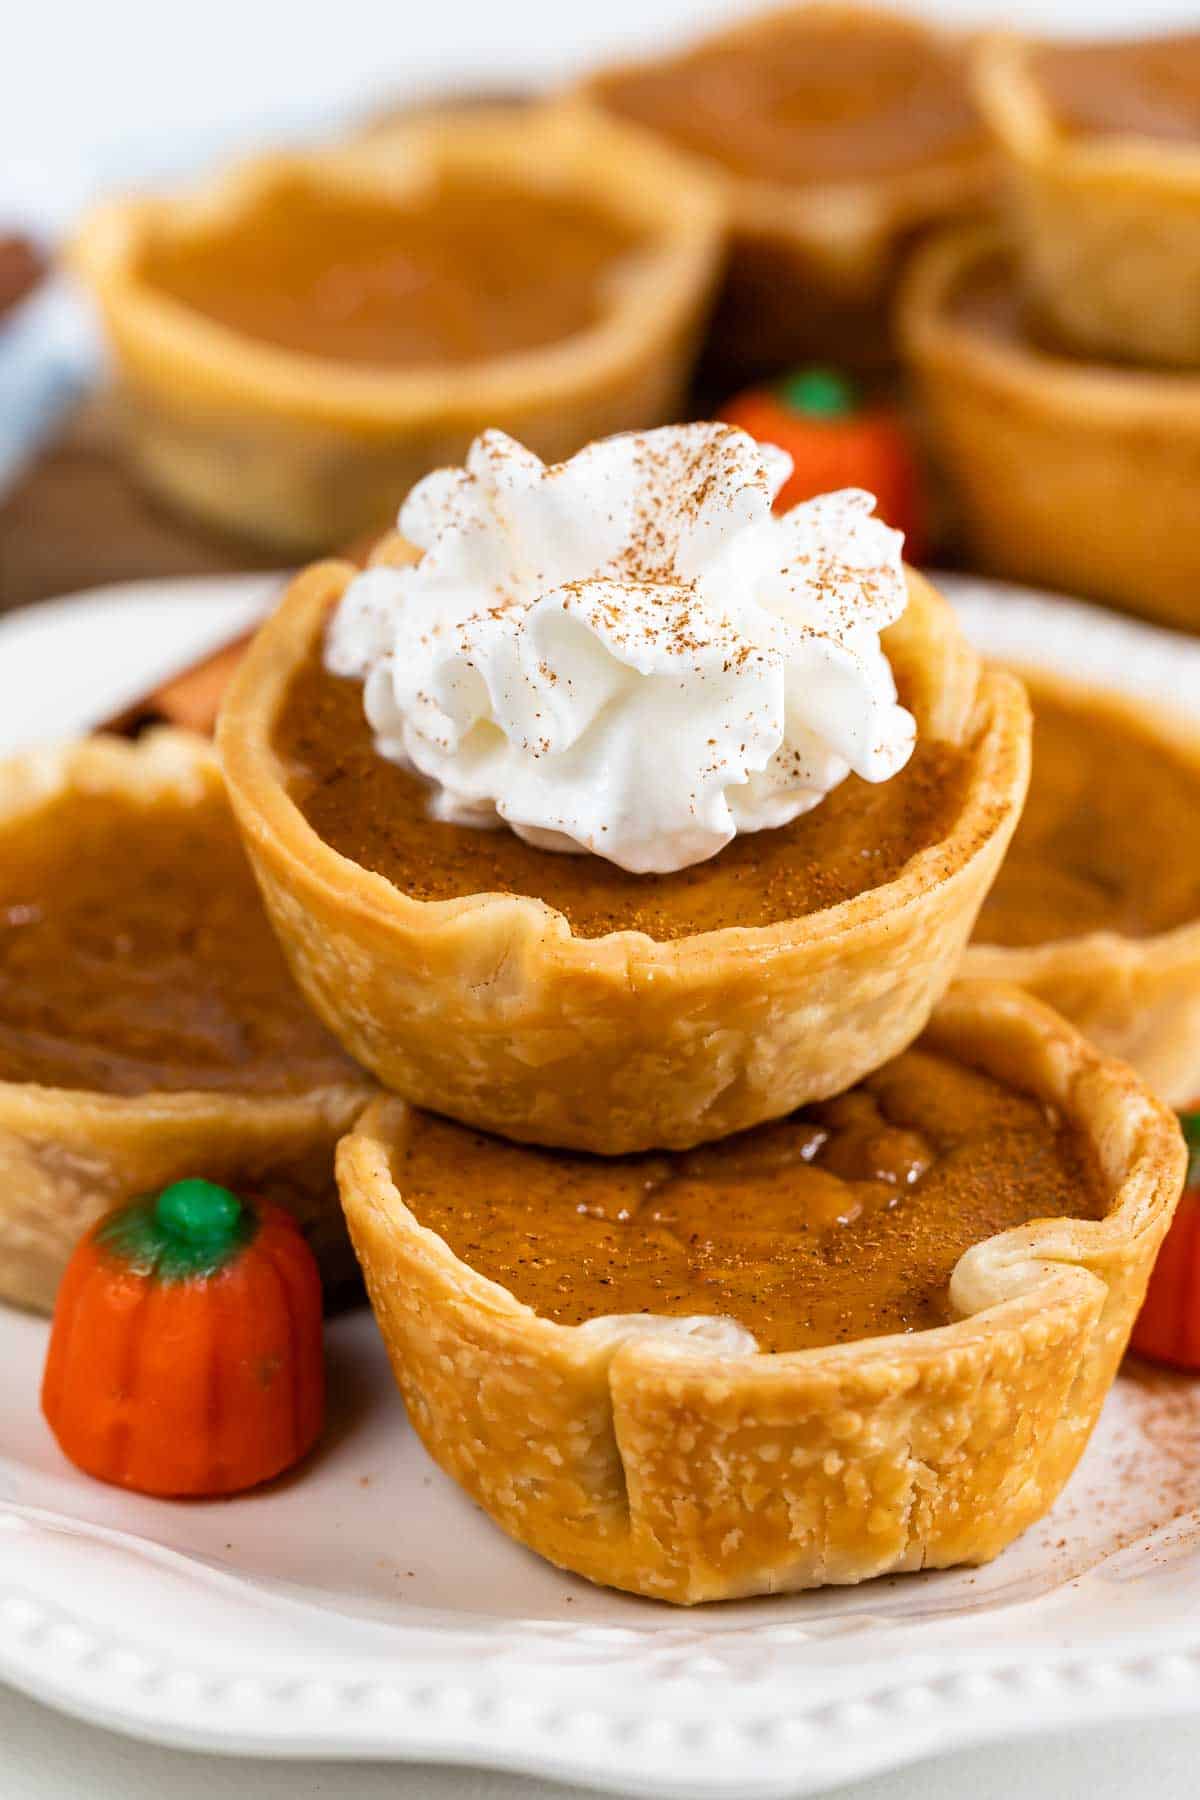
mini pumpkin pies, baked effortlessly in a standard muffin pan. These delightful, bite-sized treats deliver all the beloved flavors of traditional pumpkin pie without any of the stress. They're individual portions, meaning no messy slicing, and their inherent adorableness makes them a star on any dessert table. This guide will walk you through creating these Thanksgiving-ready gems, transforming a potentially daunting task into a joyous baking experience.
The Irresistible Allure of Mini Pumpkin Pies: Why They're a Holiday Game-Changer
The shift from a grand, traditional pie to individual
mini pumpkin pies isn't just a trend; it's a brilliant hack for holiday entertaining. Here’s why these small wonders are making such a big impact:
Say Goodbye to Pie Crust Anxiety
One of the biggest hurdles for many bakers is the pie crust itself. Rolling, crimping, blind baking, and worrying about soggy bottoms can deter even the most enthusiastic cooks. With mini pies made in a muffin pan, much of that stress melts away. You simply cut out circles of dough and press them into the muffin cavities. There's no need for elaborate edge decorating or intricate lattice work. The muffin pan does most of the shaping for you, ensuring a neat, uniform appearance every time. This simple method makes them a fantastic starting point for anyone who has ever felt intimidated by pie making.
Perfect Portions, Elegant Presentation
Imagine a dessert table where each guest can easily pick up their own perfectly portioned pie. No awkward slicing, no uneven servings, just individual perfection. This makes them ideal for mingling and allows guests to enjoy a sweet treat without feeling overly full. Visually, a platter of these tiny pies is incredibly appealing, adding a touch of rustic charm and festive elegance to your spread. They are, without a doubt, the ultimate bite-sized holiday dessert. For more insights into their charm, explore
Why Mini Pumpkin Pies Are the Ultimate Bite-Sized Holiday Dessert.
Speed and Simplicity
The filling for
mini pumpkin pies comes together in minutes – often less than five! Once the crusts are prepped, it's a quick pour-and-bake situation. Their smaller size also means a significantly shorter baking time compared to a full-sized pie. This efficiency is a game-changer during the busy holiday season when every minute counts.
Essential Ingredients for Your Perfect Mini Pumpkin Pies
Crafting exceptional
mini pumpkin pies starts with understanding the role of each ingredient. While the recipe is straightforward, selecting the right components ensures a rich, flavorful, and beautifully set dessert.
The Foundation: Pie Crusts
You'll need two standard pie crusts for a batch of about 18 mini pies. The beauty here is flexibility:
*
Homemade Pie Crust: If you love baking from scratch, a buttery, flaky homemade crust is always a treat.
*
Store-Bought Pie Crusts: For ultimate convenience, pre-made refrigerated pie dough is your best friend. Look for brands known for good quality; they roll out easily and bake up nicely. This choice significantly cuts down on prep time without compromising flavor.
*
Utilizing Scraps: Don't discard any leftover dough! Re-roll it and use a small cookie cutter to create festive shapes like leaves or stars. These can be placed on top of your mini pies before baking for an extra decorative touch.
The Heart: Pumpkin Puree
This is the star of the show. It's absolutely crucial to use
canned pumpkin puree and *not* pumpkin pie filling. Pumpkin puree is 100% pumpkin, while pie filling already has spices and sweeteners added, which would throw off your recipe's balance. Check the label carefully!
The Sweetener: Brown Sugar
Both light or dark brown sugar work wonderfully here. Light brown sugar offers a milder molasses flavor, while dark brown sugar provides a deeper, more robust caramel note. Whichever you choose, ensure you *tightly pack* the sugar into your measuring cup. This compaction is essential for accurate measurement and ensures the right level of sweetness and moisture in your filling.
The Warmth: Spice Blend
The classic autumn spice blend elevates these pies from simple pumpkin to truly irresistible. Our recipe calls for a fragrant combination of:
*
Cinnamon: The predominant and comforting spice.
*
Ginger: Adds a warm, slightly zesty kick.
*
Nutmeg: A sweet, woody aroma that pairs perfectly with pumpkin.
*
Cloves: A strong, sweet, and pungent spice that adds depth.
Feel free to adjust the quantities to your preference, or even add a pinch of allspice or cardamom for a unique twist.
The Richness: Evaporated Milk
Often confused with sweetened condensed milk, evaporated milk is distinctly different. It's unsweetened milk that has had about 60% of its water removed, resulting in a richer, slightly creamier consistency than regular milk. This richness contributes significantly to the luxurious texture and profound flavor of your pie filling without adding excessive sweetness.
The Binder: Eggs
Eggs are essential for binding the filling together, ensuring it sets properly into a smooth, custard-like consistency. For best results, use a *room temperature* egg. A room temperature egg incorporates more evenly into the mixture, preventing a curdled or lumpy texture. If you've forgotten to take your egg out in advance, simply place it in a bowl of warm water for 5-10 minutes.
The Balance: Salt
A small pinch of salt is vital. It doesn't make the pie taste salty; rather, it brightens and enhances all the other flavors, balancing the sweetness and deepening the spice notes.
Mastering Your Muffin Pan Mini Pumpkin Pies: Step-by-Step
Creating these delightful
mini pumpkin pies is straightforward, perfect for a relaxed baking session.
Step 1: Prepare the Pie Crusts
1.
Roll it Out: On a lightly floured surface, roll out your pie crusts until they are about 1/8-inch thick.
2.
Cut the Circles: Use a 3.5-inch round cookie cutter or the rim of a drinking glass to cut out 18 circles from your dough. Don't worry if it's not exactly 18; you can always re-roll the scraps.
3.
Form the Cups: Gently press each dough circle into the cavities of your muffin pans. Ensure the dough is snug against the bottom and sides, creating a small cup. If using a standard 12-cup muffin pan, you'll likely need two pans or bake in batches.
4.
Chill: Place the muffin pans with the crusts into the refrigerator while you prepare the filling. Chilling helps the crust maintain its shape during baking.
Step 2: Whisk Up the Flavorful Filling
1.
Combine Dry Ingredients: In a medium bowl, whisk together the brown sugar, cinnamon, ginger, nutmeg, cloves, and salt until they are thoroughly combined and no lumps remain.
2.
Add Wet Ingredients: Pour in the canned pumpkin puree, evaporated milk, and the lightly beaten, room temperature egg.
3.
Gentle Whisking: Whisk the mixture gently until just combined. Be careful not to overmix, as this can introduce too much air, leading to cracks in your baked pies. The goal is a smooth, homogenous mixture.
Step 3: Fill, Bake, and Cool
1.
Fill the Crusts: Remove the chilled muffin pans from the refrigerator. Spoon approximately two tablespoons of the pumpkin pie filling into each pie crust-lined cavity. Avoid overfilling, as the pies will puff slightly during baking.
2.
Bake: Preheat your oven to 400°F (200°C). Bake the
mini pumpkin pies for roughly 16 to 20 minutes. The pies are done when the edges of the crust are golden brown and the filling appears set, with a slight jiggle in the very center when gently shaken.
3.
Initial Cool Down: Remove the muffin pans from the oven and allow them to cool on a wire rack for at least 30 minutes. This initial cooling helps the pies firm up.
4.
Final Cooling and Chilling: Carefully remove the mini pies from the muffin pan (a small offset spatula can be helpful here) and transfer them back to the wire rack to cool completely at room temperature. Once entirely cool, place them in an airtight container and chill them in the refrigerator for at least 3 hours. For the best flavor and texture, chilling overnight is highly recommended. This allows the spices to meld and the custard to fully set, resulting in perfect mini pumpkin pies with no pie decorating stress for holidays. More tips on this can be found at
Perfect Mini Pumpkin Pies: No Pie Decorating Stress for Holidays.
Tips for Success, Customization, and Flawless Serving
To ensure your
mini pumpkin pies are nothing short of spectacular, consider these expert tips and serving suggestions:
Troubleshooting Common Issues
*
Cracked Tops: If your pies develop small cracks, it's often a sign of slight overbaking or rapid cooling. Don't worry, they'll still taste amazing, and any cracks can be easily hidden with whipped cream!
*
Soggy Bottoms: Ensure your pie crusts are chilled before filling. You can also lightly brush the bottom of the crusts with an egg wash before baking, which creates a barrier against the filling's moisture.
*
Doneness Test: The best way to check for doneness is when the edges are set, and the center still has a slight, delicate wobble. It will firm up completely as it cools.
Freezing for Future Feasts
Yes, these
mini pumpkin pies freeze beautifully!
1.
Cool Completely: Ensure pies are completely cooled and chilled before freezing.
2.
Flash Freeze: Place the pies on a baking sheet and freeze until solid (about 1-2 hours).
3.
Store: Transfer the frozen pies to a freezer-safe bag or airtight container, separated by parchment paper to prevent sticking. They can be frozen for up to 1 month.
4.
Thaw: Thaw overnight in the refrigerator before serving.
Dressing Up Your Mini Pies
While delightful on their own, a little garnish can make these pies truly sing:
*
Classic Whipped Cream: A dollop of freshly whipped cream is always a crowd-pleaser.
*
Dusting of Spice: A light dusting of ground cinnamon or nutmeg over the whipped cream.
*
Caramel Drizzle: A swirl of homemade or store-bought caramel sauce.
*
Candied Nuts: Sprinkle with candied pecans or walnuts for added crunch and sweetness.
*
Crust Decorations: As mentioned, use leftover dough scraps to create small cut-outs (leaves, stars) to bake on top.
Make-Ahead Marvel
The fact that these pies require significant chilling time makes them an ideal make-ahead dessert. Prepare them a day or two before Thanksgiving, and you'll have one less thing to worry about on the big day.
Conclusion
These
mini pumpkin pies made in a muffin pan are more than just a dessert; they're a revelation for holiday baking. They remove the anxiety of traditional pie making, offer charming individual portions, and deliver that quintessential Thanksgiving flavor in every delightful bite. Their ease of preparation and make-ahead potential mean you can spend less time stressing in the kitchen and more time enjoying precious moments with loved ones. So this Thanksgiving, embrace the simplicity and joy of these irresistible mini treats. Your guests will thank you, and your holiday will be all the sweeter for it!